
How-To: Create Facebook Access Token
This tutorial will provide a step-by-step guide on how to get Long-Lived Page Facebook Access Token with custom permissions. A generated access token can be used with the WPSwlr WordPress plugin. To generate an access token, Facebook App is required. You can create both, your own Facebook App and Access Token by following these steps:
Create a new Facebook App
1. Go to the Facebook for Developers page – https://developers.facebook.com/apps.

2. Click on the Create App button.
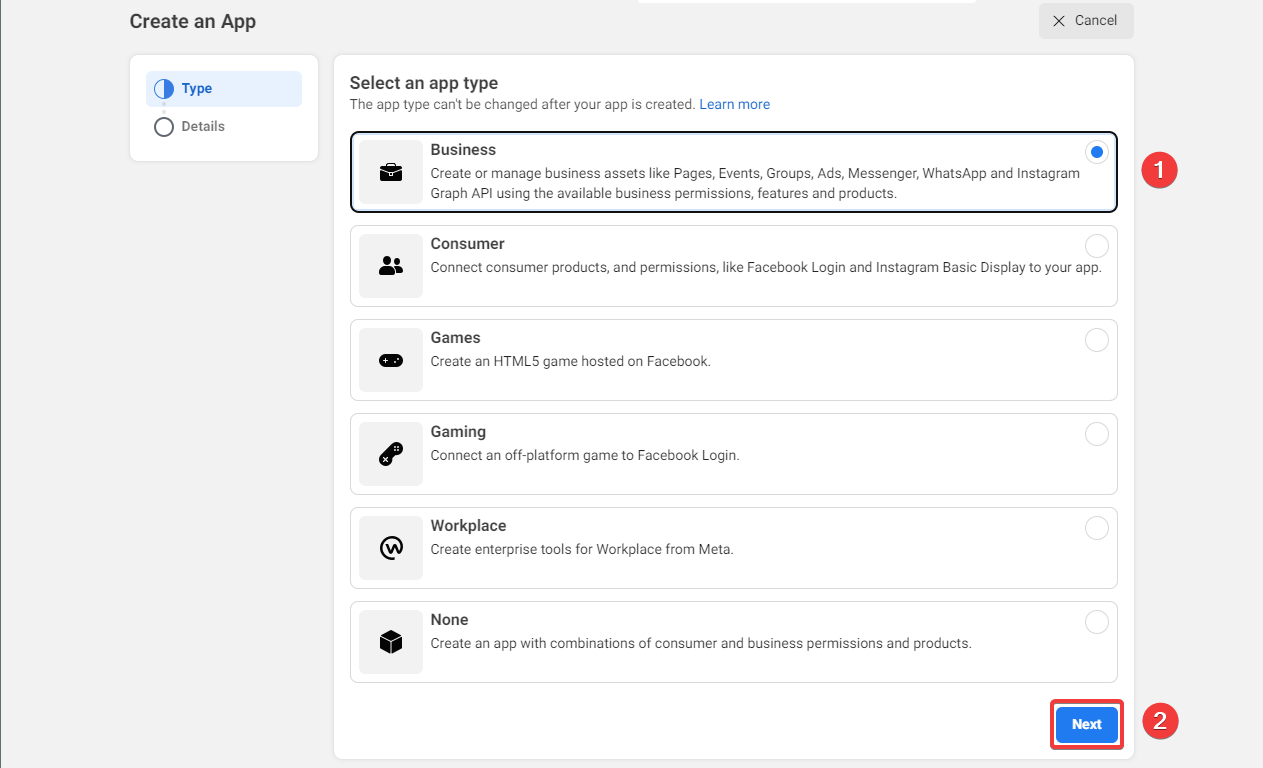
3.1. Select an app type. If you don't know which one to choose, select Business.
3.2. Click on the Next button.
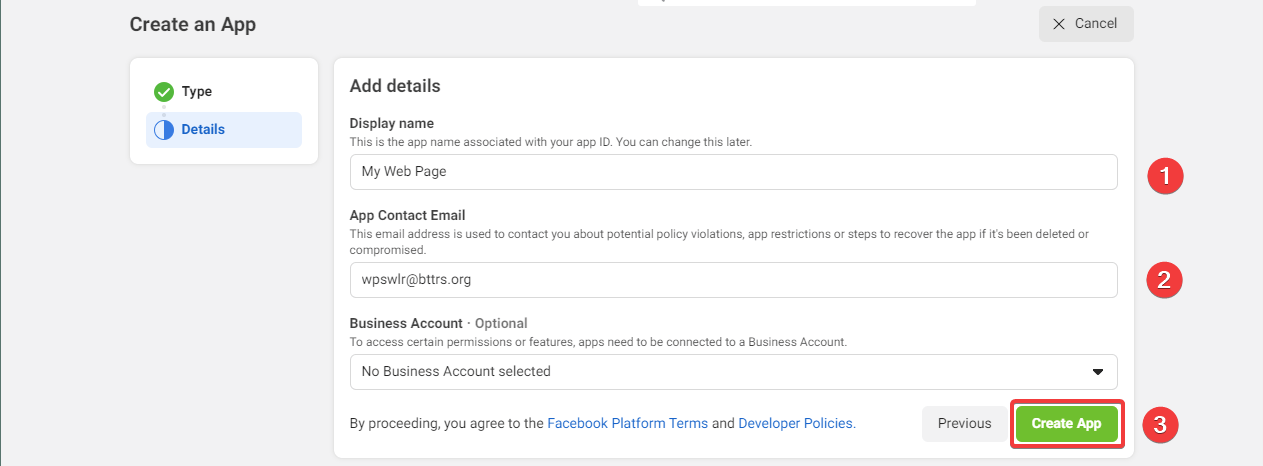
4.1. Fill in the Display Name of the new app.
4.2. Fill in the App Contact Email.
4.3. Click on the Create App button.
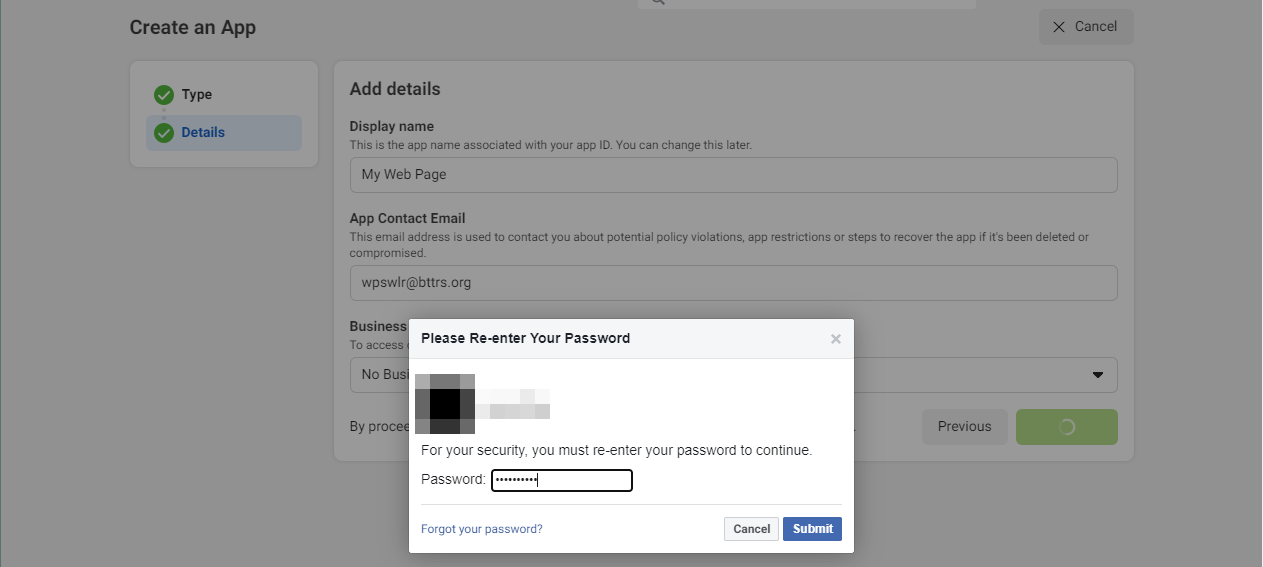
5. Enter your password if required and click on the Submit button.

6. You will be redirected to your new app.
Create an Access Token
1. Open a new tab and go to the Graph API Explorer –https://developers.facebook.com/tools/explorer.
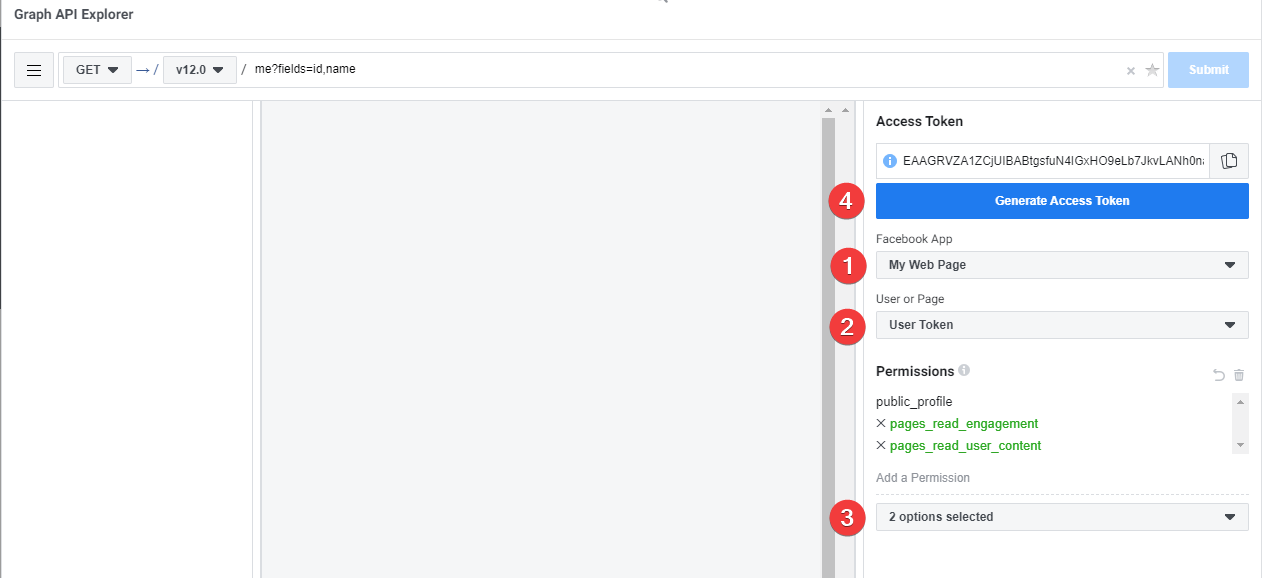
2.1. Select your newly created Facebook App.
2.2. Select User Token.
2.3. Add permissions you need. For the WPSwlr plugin, you need to add: pages_read_engagement and pages_read_user_content.
2.4. Click on the Generate Access Token button – this will generate a new Access Token with newly selected Permissions.
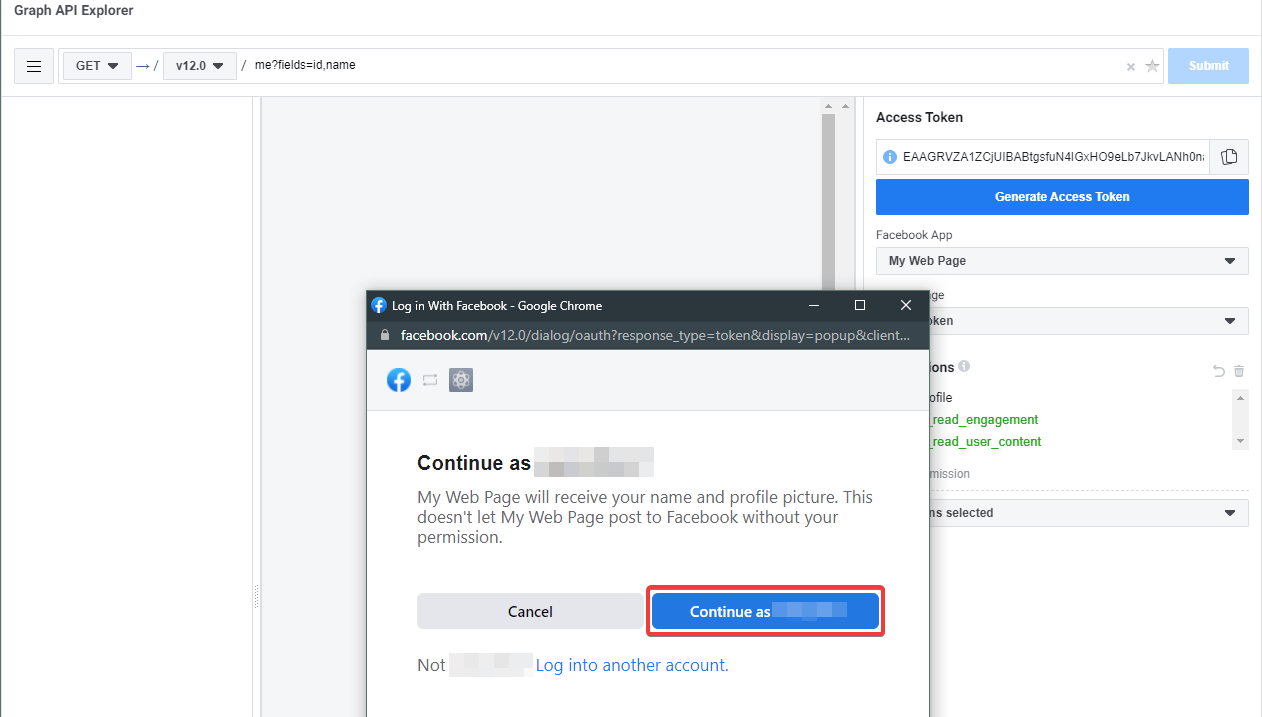
3. Click on the Continue as <User Name> button.

4.1. Select a Facebook page that you want to use with WPSwlr.
4.2. Click on the Next button.
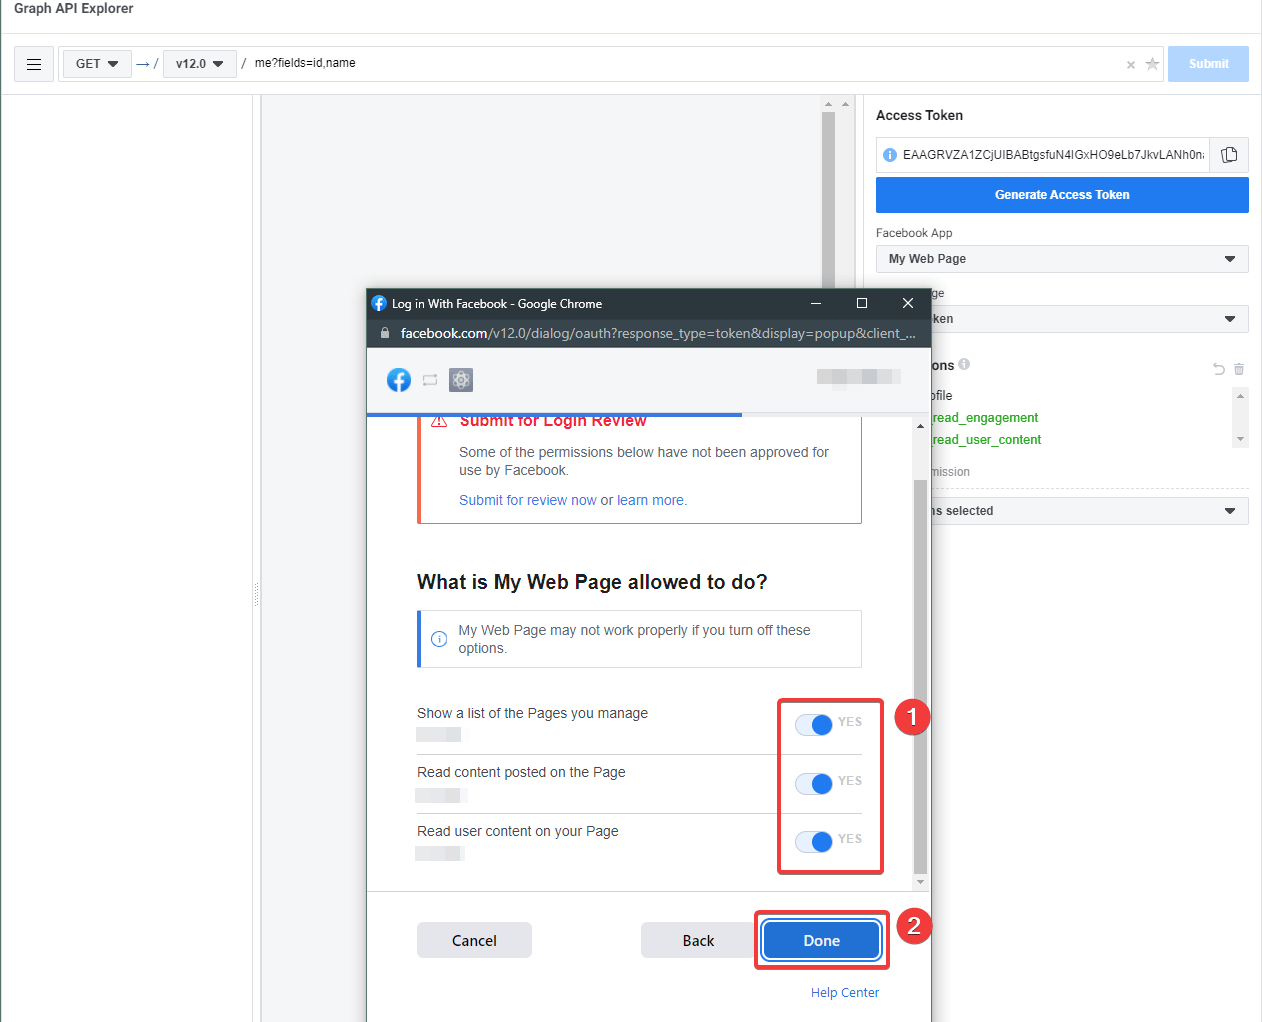
5.1. Enable all listed permissions.
5.2. Click on the Done button.
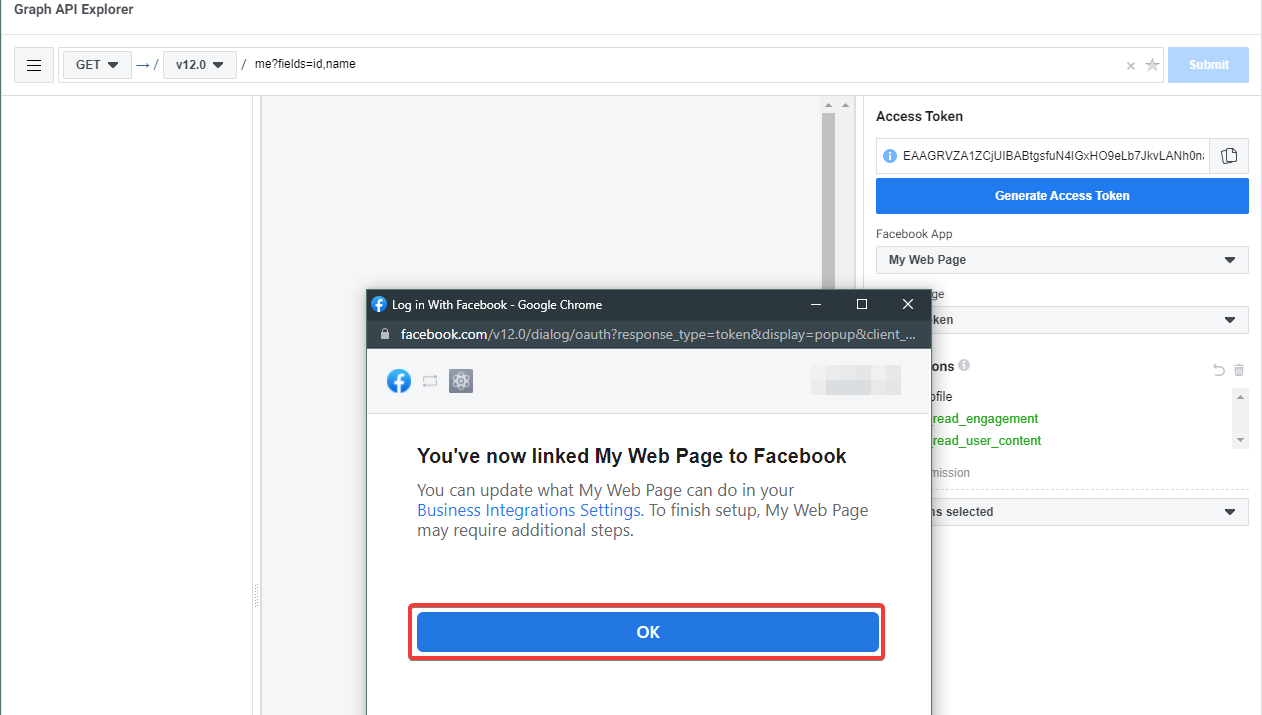
6. Click on the OK button.
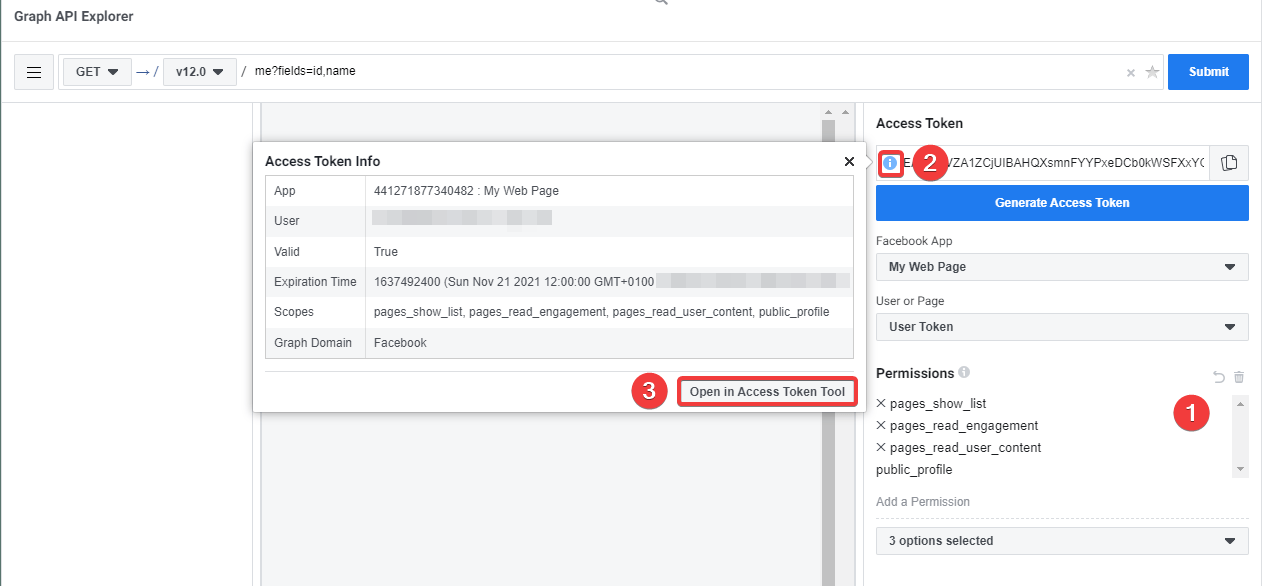
7. If everything worked correctly, a new access token with selected permissions was generated.
7.1. New Permissions are not highlighted anymore.
7.2. Click on the little "info" icon in the Access Token text field.
7.3. Click on the Open in Access Token Tool in the info popup.
Don't close this window, we will get back to it later.
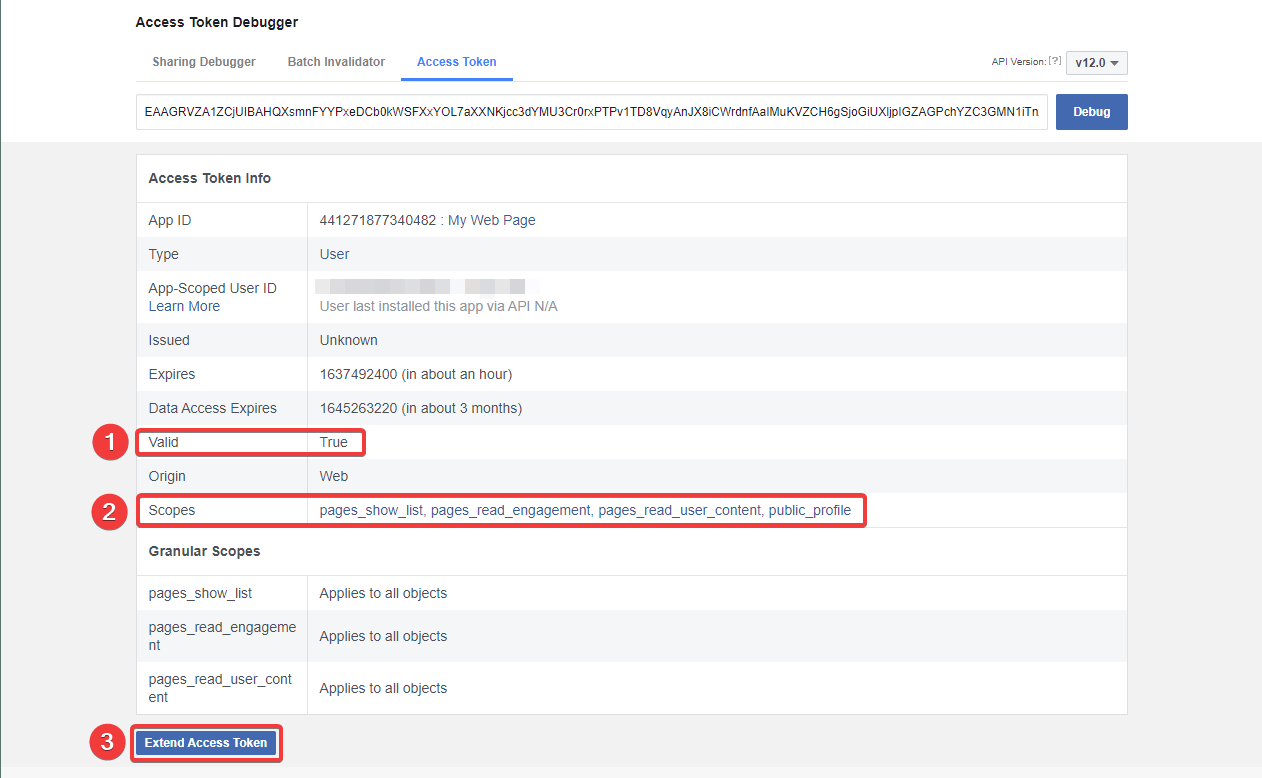
8.1. Verify that Valid is True.
8.2. Verify that pages_read_engagement and pages_read_user_content scopes are selected.
8.3. Click on the Extend Access Token button
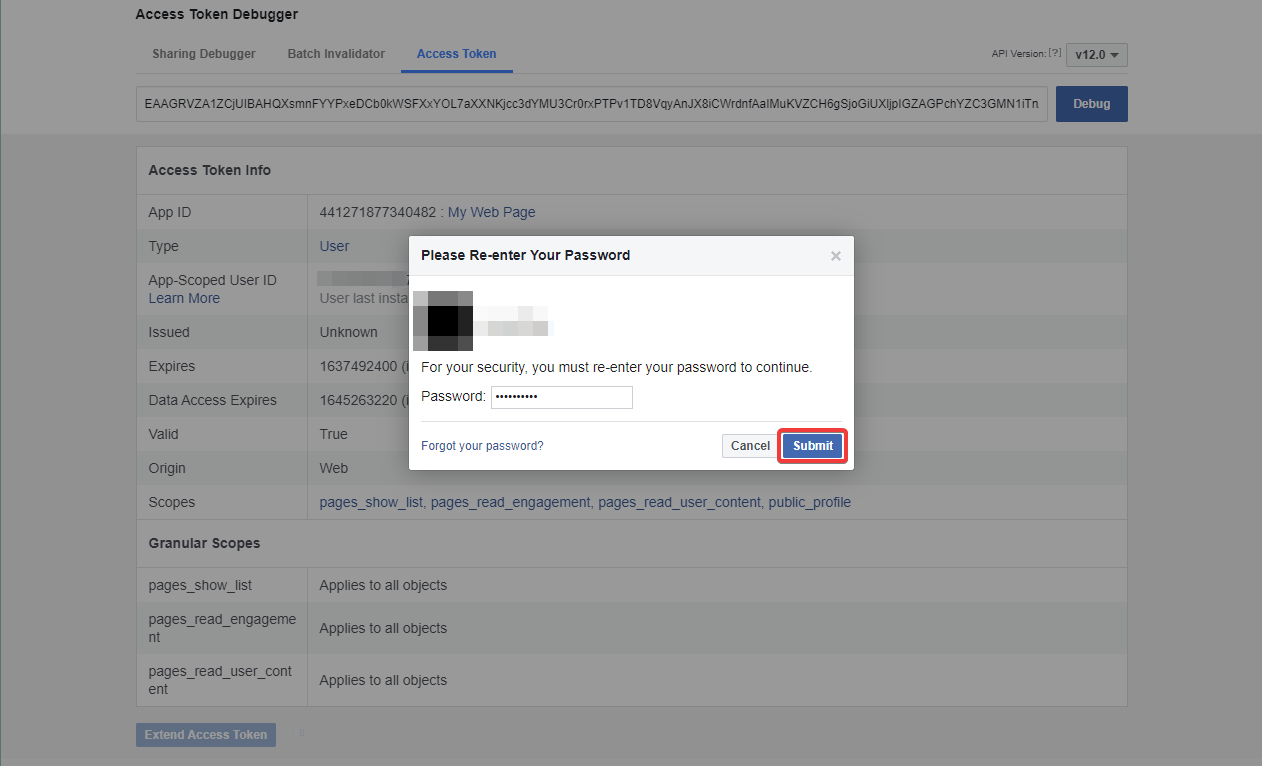
9. Enter your password if required and click on the Submit button.
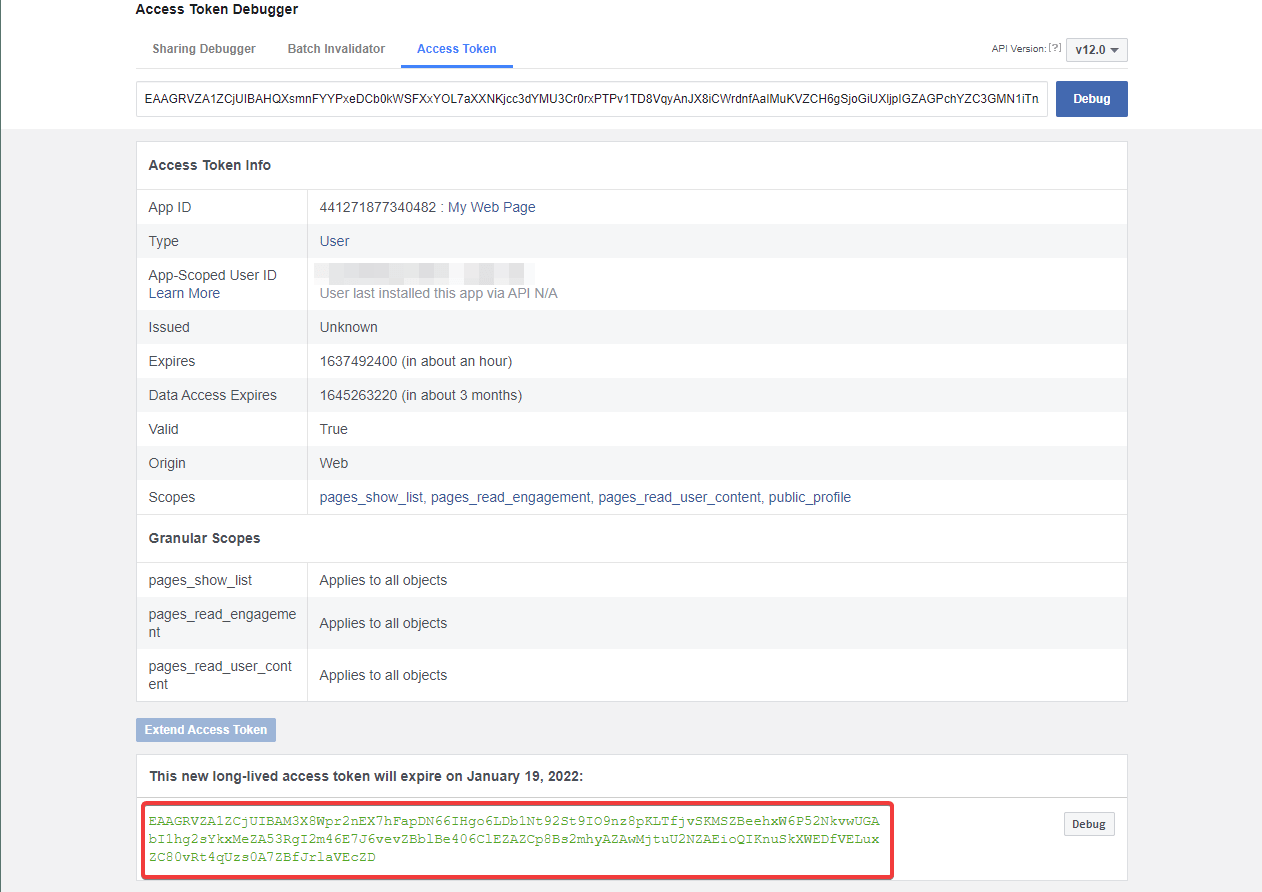
10. A Long-Lived access token was generated. Don't close this window, we will get back to it later.
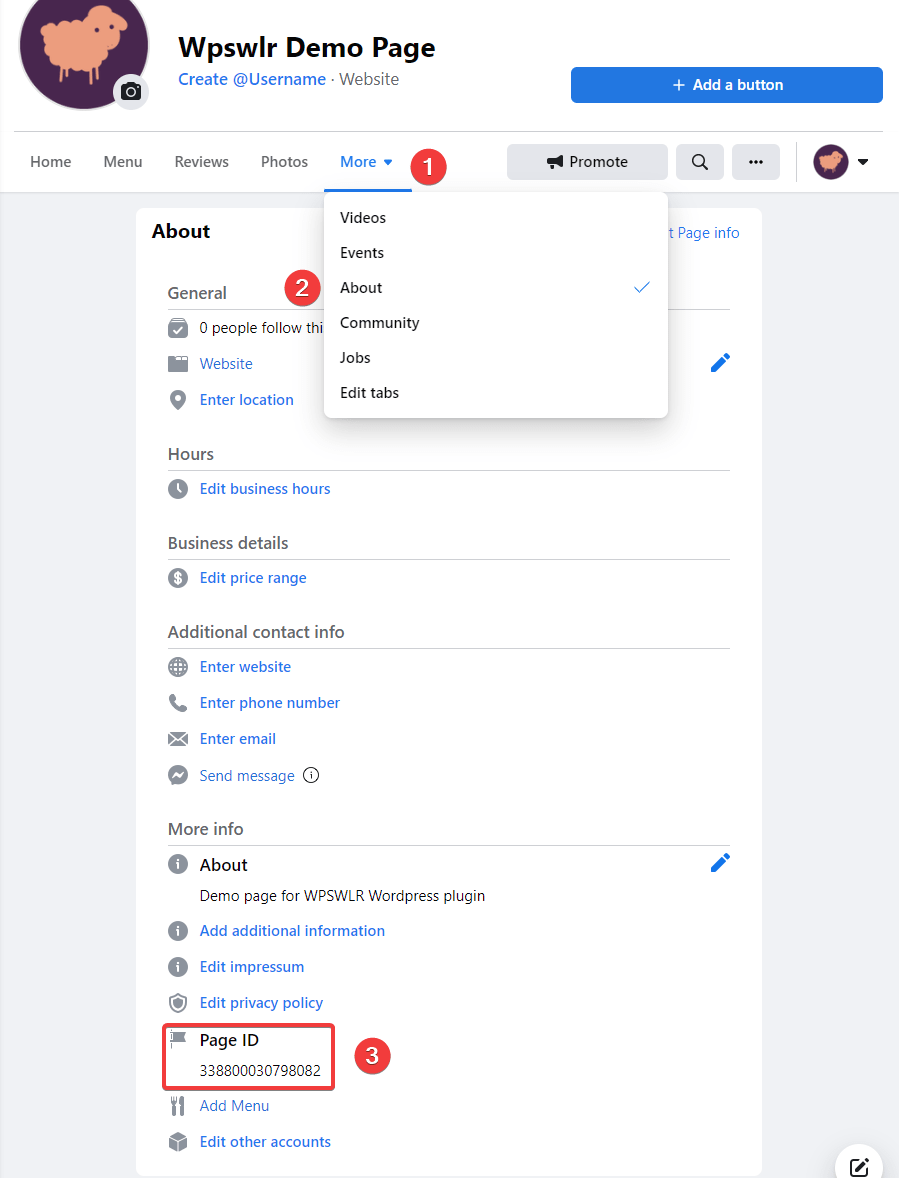
11. You will need the ID of your Facebook page. If you don't know this ID, you can get it in the page info. Go to your Facebook page ➟ Click on More in the top menu ➟ Click on About ➟ Scroll down to More Info.
Don't close this window, we will get back to it later.
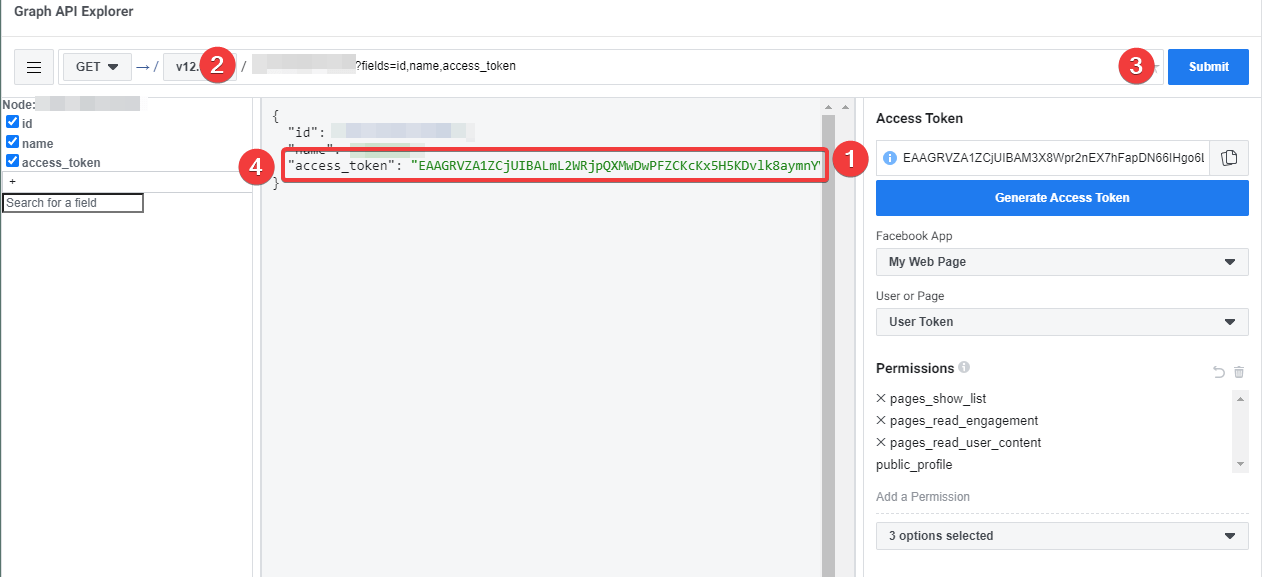
12. Go back to the Graph API Explorer from point 7.
12.1. Copy Long-Lived Access Token (from point 10.) to the Access Token field.
12.2. Enter <page_id>?fields=id,name,access_token to the request field. Replace <page_id> with your Page ID from point 11.
12.3. Click on the Submit button.
12.4. You will get a response with your new Page access token without expiration. You can use this access token and page ID in the WPSwlr plugin.
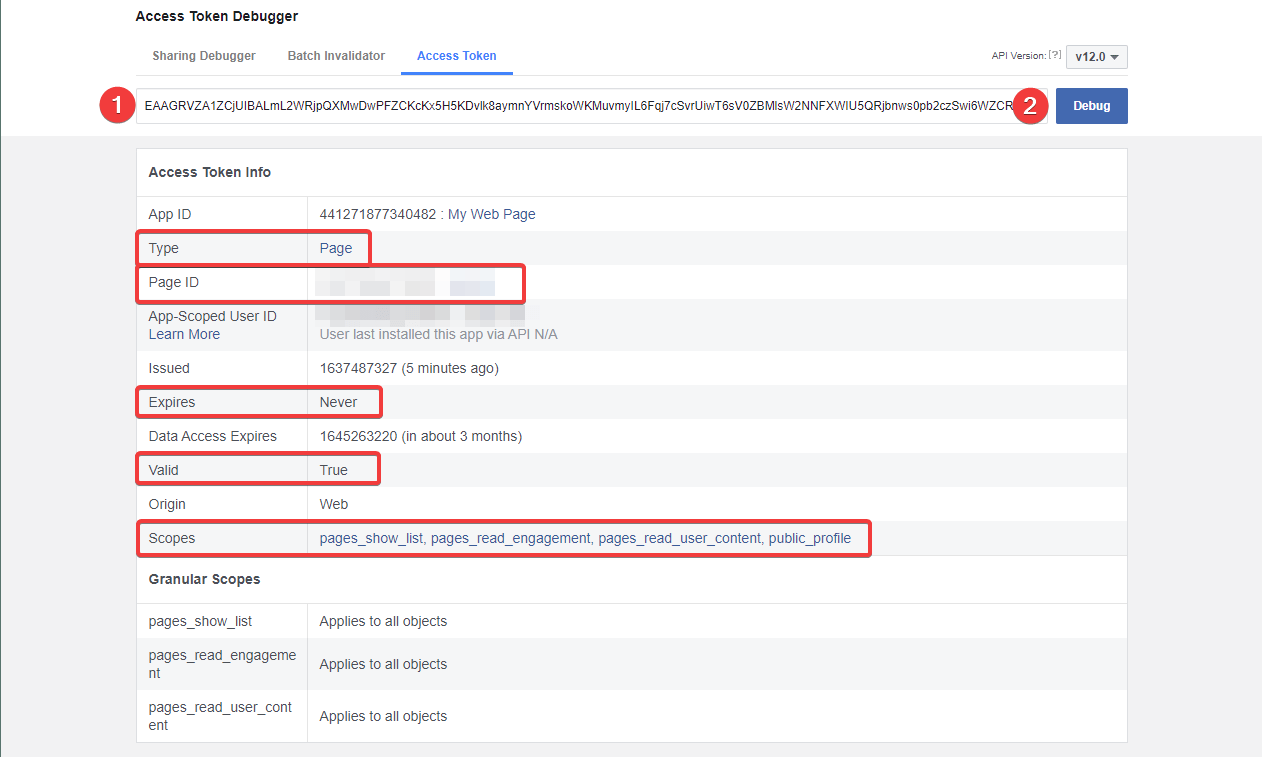
13. To verify that the access token generated in the previous steps is correct, open a new tab and go to Access Token Debugger – https://developers.facebook.com/tools/debug/accesstoken
13.1. Copy your new access token from step 12. to the input.
13.2. Click on the Debug button.
You can compare your Access Token Info with the one above – highlighted parts are important. Page ID should be ID from step 10.